Overview
Menus control how visitors navigate your website. Keeping menus organized and up to date ensures users can easily find important information.
Managing Menus
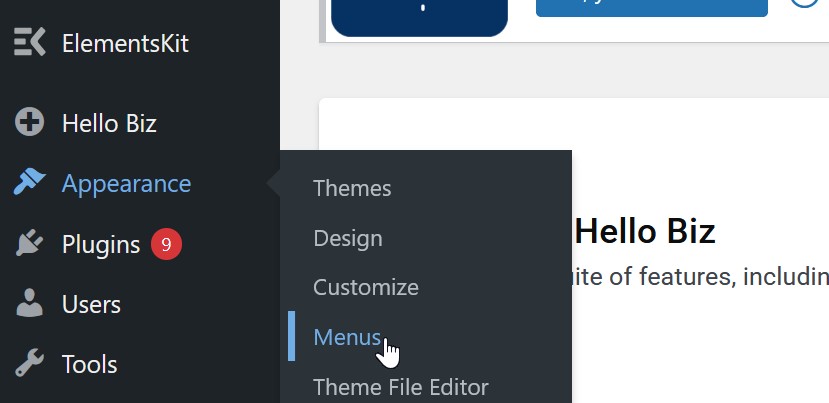
To update your navigation menu, go to Appearance → Menus in your Admin dashboard. Select the menu you wish to edit (for example, the main navigation menu).
Adding Menu Items
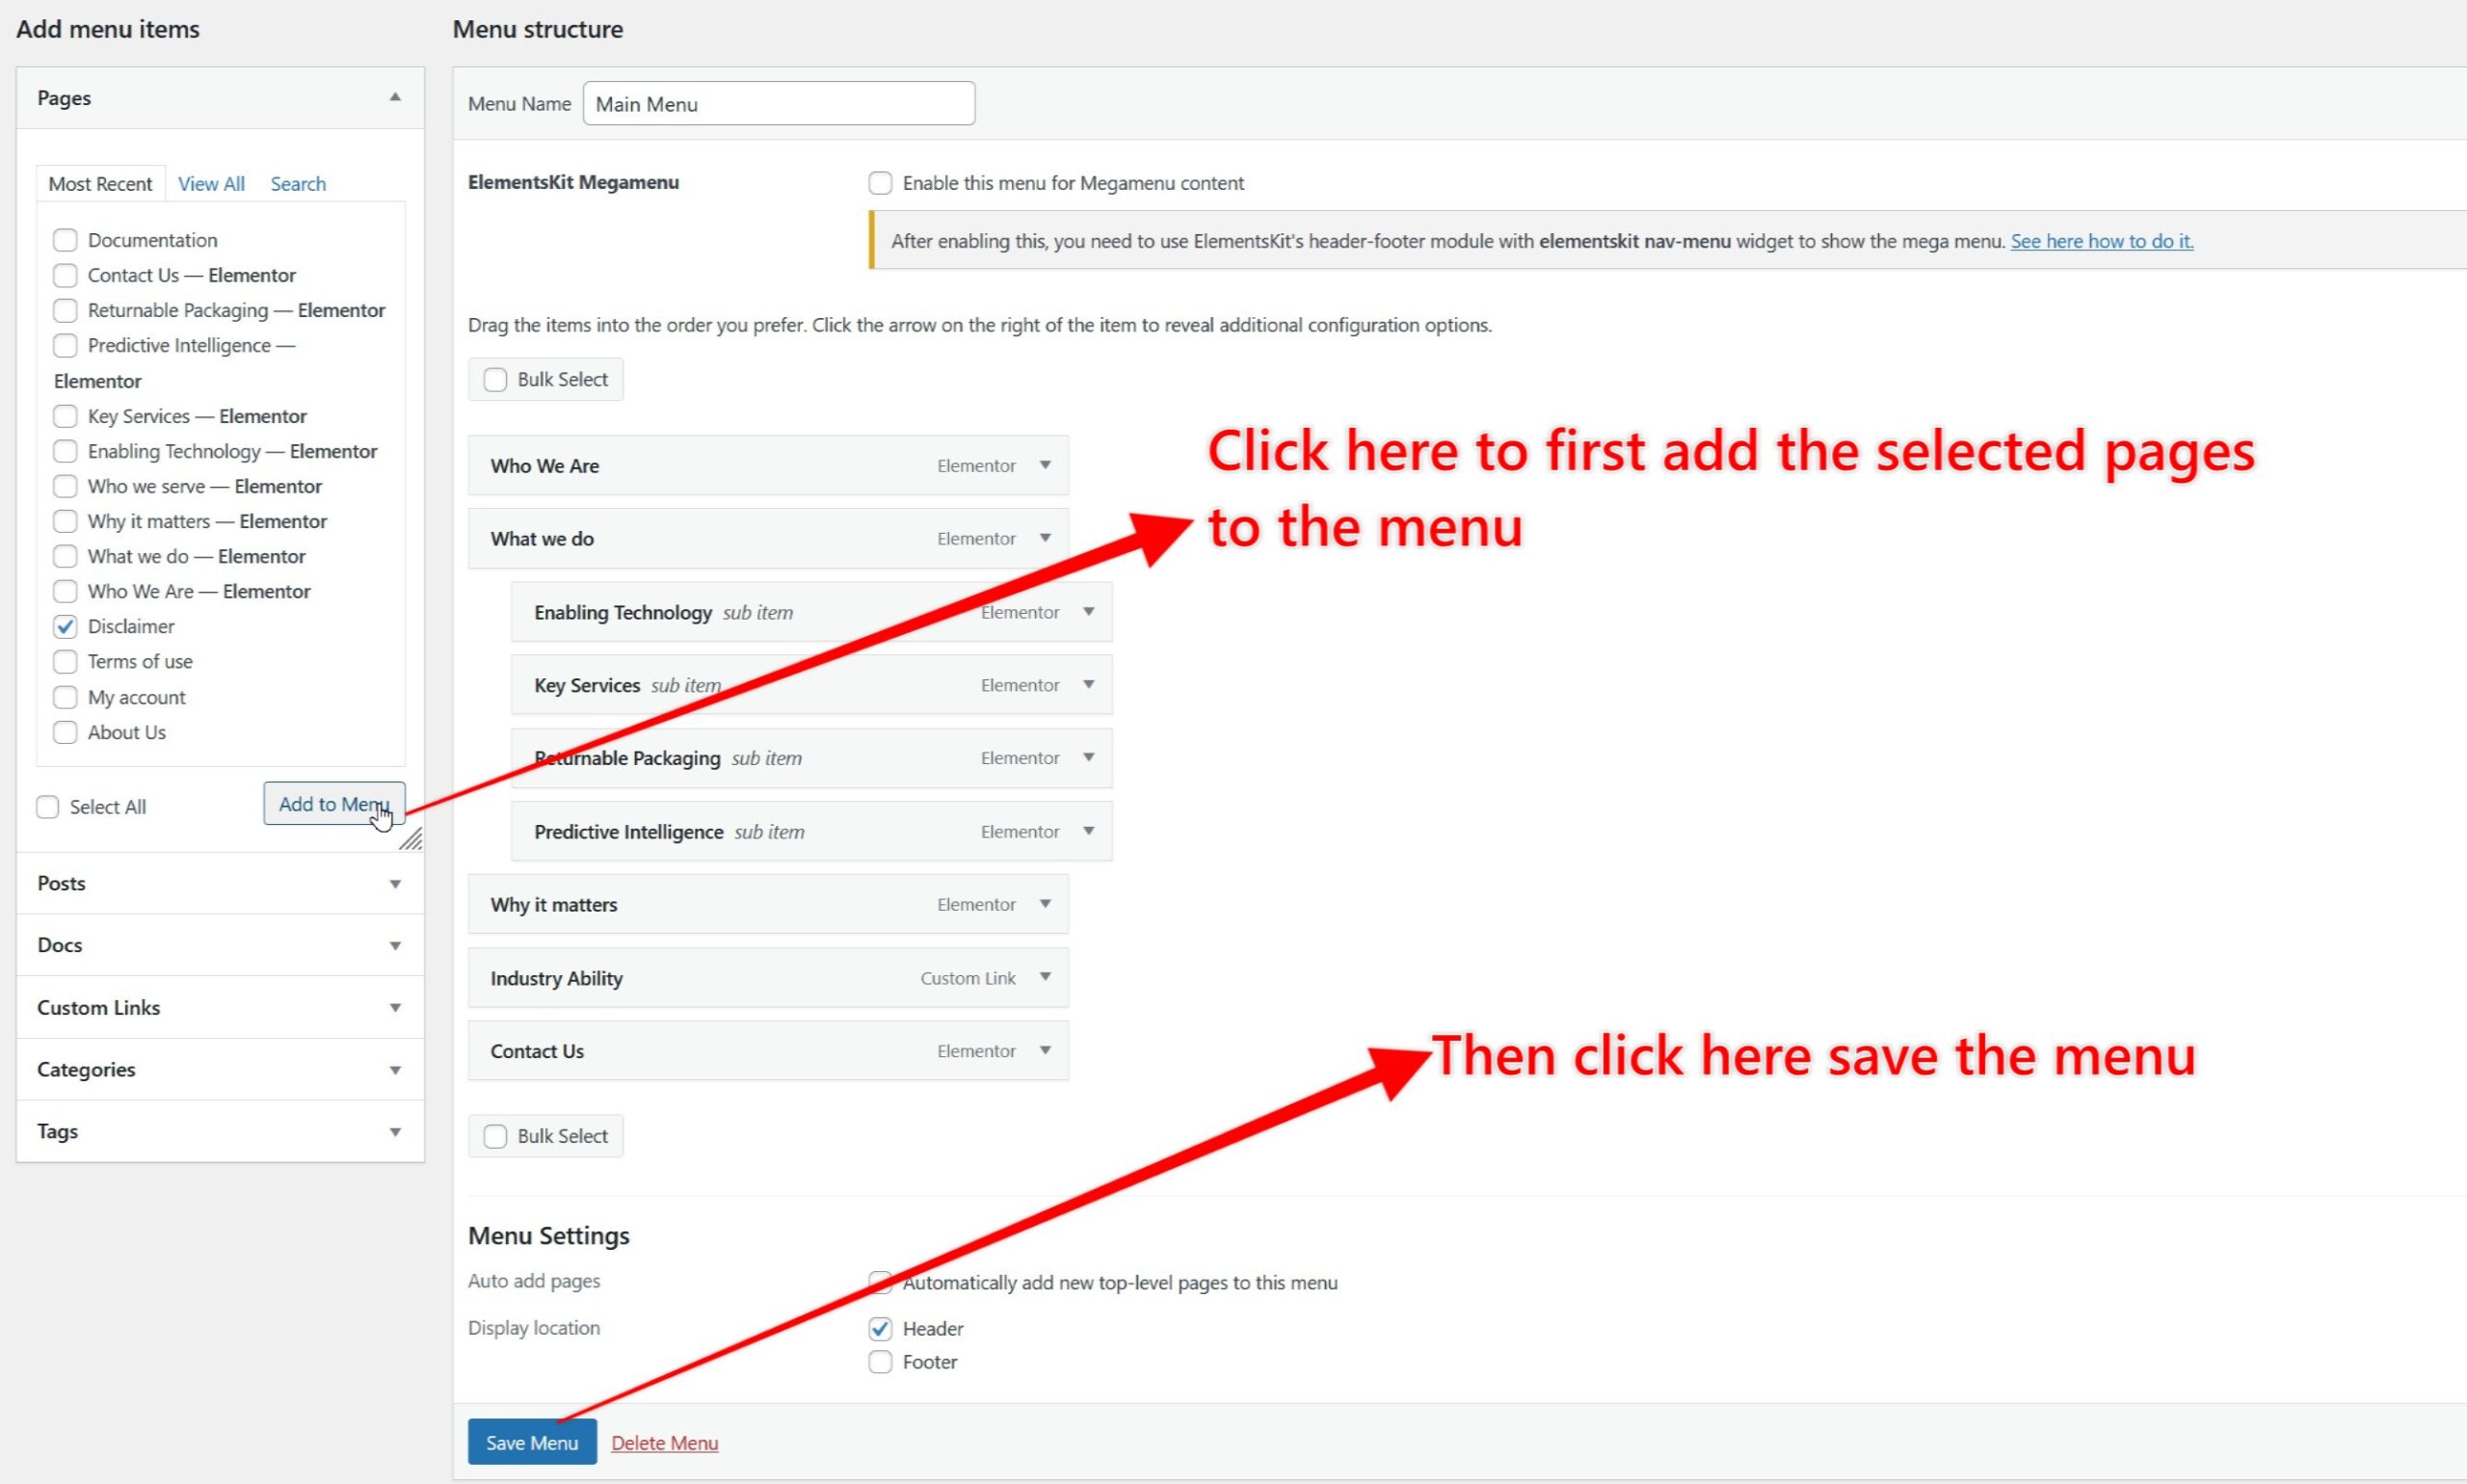
You can add pages, posts, or custom links to your menu. Simply select the item from the list and click Add to Menu. Once added, you can position it where needed. Then Click on Save Menu
Reordering Menu Items
Menu items can be rearranged using drag-and-drop. You can also create dropdown menus by slightly indenting items under a parent item.
Proper menu structure improves user experience and site navigation.
Removing Menu Items
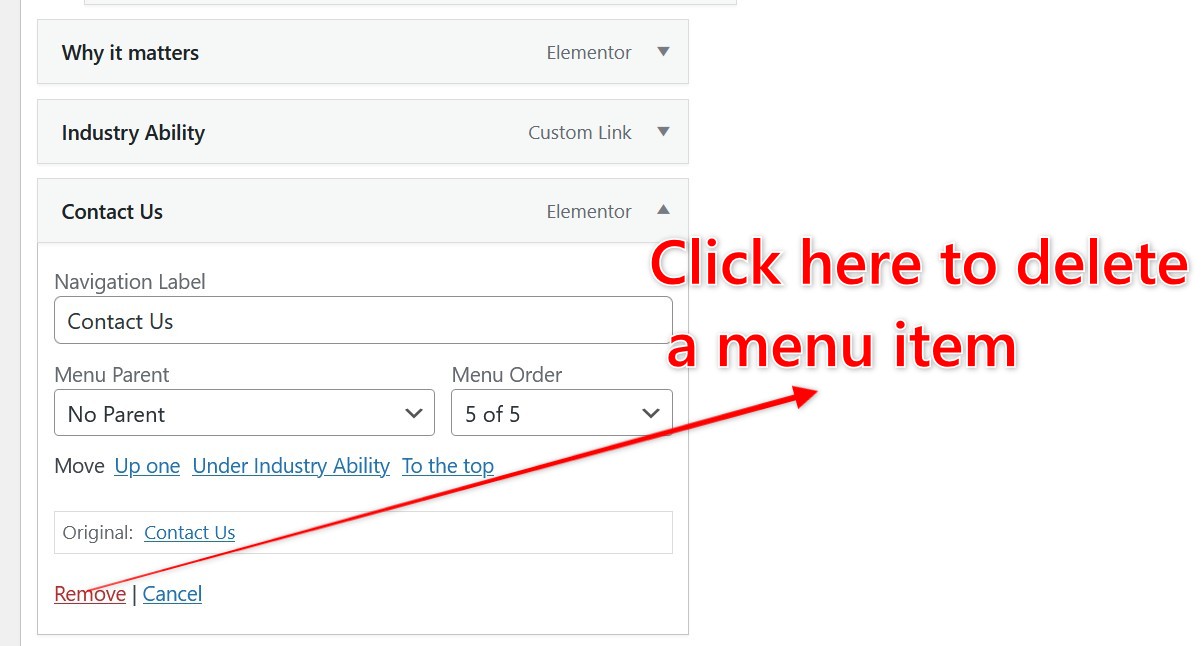
If a menu item is no longer needed, expand it and click Remove. This will not delete the page itself—only the link in the menu.
Saving Changes
After making updates, always click Save Menu to apply your changes. It is recommended to check your website afterward to confirm the menu displays correctly.